*******
SubTitle :: Do It Yourself with a Friend is Twice as Nice
Yesterday, I told you a little bit about how I ended up here. In this post, I work with Beth of Beth’s DIY Workshop to build a birdhouse from scrap cedar. This birdhouse was my gift in a White Elephant Gift Exchange for this year’s Baltimore Bloggers Holiday Party hosted by One Project Closer.
Update: It’s with great sadness I report that Beth has closed her doors.
Scrap cedar was not only perfect for this project, but it has been a go-to on several projects for me. Read How a Build a Cedar Box for Storage for partners – Black + Decker. Enjoy. ~jb
*******
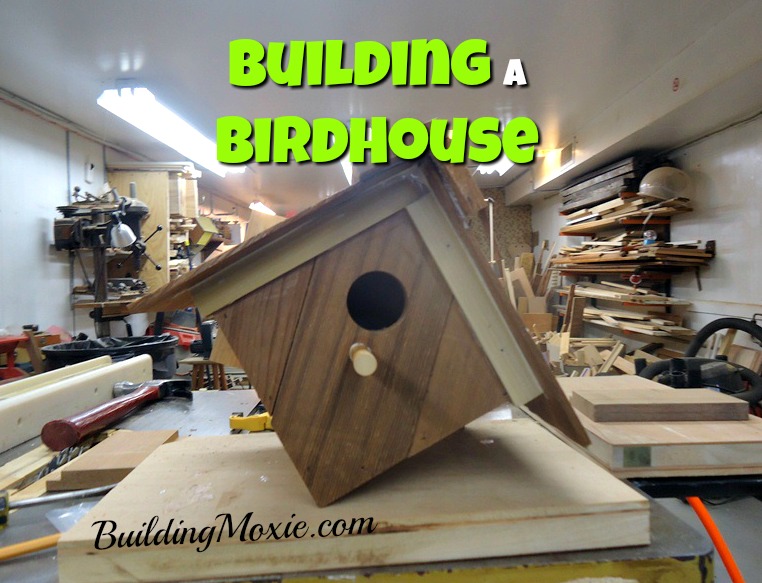
This is What I We Did: Building a Birdhouse Building Moxie Style
So, the birdhouse. I toke this stack or rough milled cedar scrap (white cedar, I believe). It had been cut, a few years ago, from the arches of our cedar fence (there is a great tutorial there one day). I also grabbed some leftover cedar shakes (from my previous house) and headed up to Beth’s.

The birdhouse below survived the renovations around the homestead … so far. It is still mounted to our small shed – a one time chicken coop. It acted as inspiration for this project. After thinking for awhile about roof design, it occurred to me I wouldn’t have to deal with roof framing, or funky cuts, if I just built a box and flipped it on … a diagonal.


*******
Building a Birdhouse (Steps)
Of course there are literally an endless number of possibilities in birdhouse design. Google should yield tons of inspiration and in many cases plans.
* Square Up Salvaged Material
At Beth’s, I started by squaring the ends up, creating equal lengths. For this, I used the shop’s sliding compound miter saw.

* Plane Cedar to a Consistent Thickness
We then took the ¾ inch boards (around 11” in length) and ran them through the table planer. Taking a 1/16th off of each side, this gave us 5/8th inch stock to work with. Running these across the table planer was much nicer than running through my budget table saw at home. And it was way more accurate, I assure you. (As with most of the tools in the shop, Beth demonstrated and I finished. The only exception to this really – the drill press a little ways below, which Beth worked for me.)

* Cut Rabbets at each Board’s Edge – for Lap at Side Walls
Taking the now planed boards, we ran them across the table saw with a dado set installed. We were making rabbets (notches) that were half the depth of the board (in this case 5/16”) – ½” from the edge. The idea being that when glued and lapped – two boards each making a side, could be nailed. Again, I have a dado kit at home, but I assure you this was much faster on Beth’s rig. With setup, this step, too, took about 15 minutes.


While we didn’t review plans, I was fortunate that Beth actually had a birdhouse, okay two, hanging in her shop. One was built, she told me, from a set of plans provided by the Sierra Club. Using that birdhouse, we determined both an appropriate depth for the birdhouse, plus the preferred size for the birdhouse entrance. One and half inches in diameter.

* Cut Boards to Size
From there, we gang cut, in two passes, four boards at a time on the sliding miter saw. This yielded 16 planed and notched boards 5 1/2” long.


* Glue and Nail Up the Box – Building Walls
Now, it was simply a matter of gluing and nailing this stock to create a box. (A class that Beth actually teaches at the Workshop.) We assembled all the sides using a pin nailer (like a pneumatic brad nailer only shooting smaller nails). Again, I don’t have one at home.
They were a little long and we had to flip these boards over to snip off the ends poking through. No biggie, as we caught ourselves saying, well, a few times – “It’s only a birdhouse.” (Note the “split” in the pair of boards we used as a nailing surface. This kept the too long nails from nailing into anything.)


* Assemble the Box
We then assembled the box: gluing and weaving at each corner to make a perfectly square box. Here we used 1 ½” 16 gauge brad nails. Done in a jiffy.


* Create the Face (Front of the Birdhouse)
In the end, we decided to run both sides of two longer pieces across the dado blades. This created two tees. These boards would act as the center “slats” for the front and the back of the birdhouse. Note: You could do this kind of notching on a table saw fitted with a standard blade, but here, it is just slightly more efficient with the dado blade.
I set these boards vertically, diagonal to my diagonal box. Ends were cut to a point, by opposing two 45s at a center. I then placed that center board (pictured: Beth doing one) lining up at the peak. We scribed the bottom ends and made those cuts, too.


* Nail the Front & Prepare for Mounting in the Back
Once (face) nailed into place, I used my remaining 5 1/2” pieces for “ears.” This revealed perhaps the one major flaw in my process and design here. These boards ended up being both a little too short and also exposed a gap (at the top) which water could maybe get into. Again – “Only a birdhouse” and they will be protected under “eaves”.
For the “ears” on the front, I scribed these too and made careful cuts. For the back, I made the impromptu decision not to cut the ears to the shape of the box. These ears I thought would make for good mounting surfaces if the new owner chooses to mount it flush somewhere. (This birdhouse could also be hung from a tree with a stainless eye-hook and some aluminum wire. Really it could be installed in any number of other ways, fastened to something or hung.)


* Cut the Entrance & Install a Perch
From here, we needed both the birdhouse doorway and a hole for a dowel, which would accommodate a little perch. These holes we set roughly on center. We cut doorway hold on Beth’s drill press using a 1 ½ inch Forstner Bit (Beth driving). Just below that we cut a 3/8” hole and found an old pool cue – placing it briefly on the stationary belt sander and cutting it to about 2 ½ inches long.
The perch was then simply glued firmly into the hole. In this case, again, I do not have a drill press at home (and especially not one that is as sweet as Beth’s old school Craftsman). A drill press certainly makes as neat a hole as I could have made at home with my drill.


* Install the Roof
Now time for the roof, and admittedly the least amount of thought went into this. I found four equally sized shakes and laid them. Butting them tightly together onto the roof essentially determining what the overhang at the front would be. I then cut the four shake shingles on their shallow side. When cutting to length, I left about 1 ½ inch extra as to create equal overhangs all the way around the roof.


* Finish the Ridge Line of the Roof
In the final steps, my glue was starting to dip. And as I still planned to tour Beth’s upstairs, this revealed perhaps my few flaws in execution. I then cut the thick side of previously used shingles; two to 2 inches and two to 1 5/8”. I did this to account for overlapping or weaving at the “roof ridge“.
I then glued the back side of each. The edges of these slapped together created a sorta ridge shingle. These when set would not fall directly over the seam at the first course of shingles. It created a more effective overhang at the front.
I then filled in with slightly longer slivers (cut from another shingle) to provide both a stagger and coverage at the seam and to give the roof a slight visual variation.

* Trim Out Roofline
Here, I was a little sloppy with the glue and some squeezed out leaving a little staining on the roof… “Only a Birdhouse.” In the final minutes, a grabbed a scrap piece of Poplar in the shop and trimmed out the exposed edge of the roof.

And there it is. Building Moxie‘s Birdhouse #1.

*******
Final Thoughts
There is something simply sublime about working with cedar. The smell is just glorious and cedar makes for a near-perfect exterior wood. While tempted to treat it … in this application, I think I’d want to check how to see what the prevailing knowledge is. How do birds feel about stain and/or paint? For now, and as a gift – it remains as is.
All that in a few hours at a local DIY Workshop. It was fun doing a creative DIY project (for once); it was fun using tools other than my own; and it was fun DIYing with someone one else. A true Do Together.

Thanks to Beth, thanks to you and thanks, well, to the birds. Have a super day all. ~jb
Scrap Cedar? Must smell amazing.
good point Bridget .. I guess there is no such thing as scrap … esp. cedar. These shorts came off our cedar fence (which was installed like 6 years old) I told the guys to leave it. I have also used similar lengths as garden edging (but you have to treat them with wood preservative before you “bury” them). It did smell heavenly. thanks for your comment. cheers.
Nice birdhouse.
I made some from scrap barrel staves (the boards used to make wood barrels) of douglas fir, another great outdoor wood. Doug fir as us carpenters like to call it is a strong straight wood and as far as smell its the dirty socks smell wood; the birds don’t seem to mind.
The magic of doing work with scraps is a profound kind of making do. Nature gives up some woods and we make shelter for ourselves and our bird friends.
I read somewhere the birds don’t need the pegs and it makes it harder for the occasional nutty squirrel to invade, so I left the pegs off and the birds moved in happy as larks as some people say.
Just for fun I also made a butterfly house, yep there really are butterfly homes and the entrances are a bit challenging to cut. I’ll send you a photo when the snow gets below 3 feet :-)
I can always count on you Paul to see the romantic side of the things we build. good info on the perch. and a butterfly house sounds fun. enjoy the snow and thanks for popping in. ~jb